

Did you know that indoor cats live an average of 10 years longer than outdoor cats? Here’s the catch—cats love the outdoors. They crave the fresh air, the sounds of birds, and the warmth of the sun on their fur. I get it—living in an apartment might make you think “Yeah, right—my cat’s stuck inside forever.” Hold on, you don’t need a big backyard or a house to give your cat that outdoor vibe.
Catio (cat patio) is the perfect way to give your pet a taste of the wild—without the risks. Got a tiny balcony, a window ledge, or just a little extra space? Perfect, you can easily build a cozy, secure, and stylish catio right in your apartment. I’m here today to walk you through everything you need to know to build (or buy) the best catio for your space.
1) Understanding Apartment-Friendly Catios
Not all catios are big, backyard-sized enclosures. If you live in an apartment, you still have great options to give your cat a safe outdoor experience. The key is choosing a setup that fits your space while keeping your furry friend secure and happy.
Types of Catios for Apartments
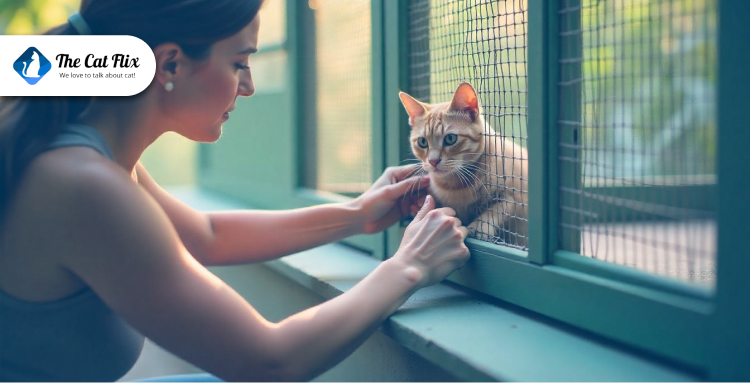
- Window Catios
A window catio is like a cozy sunroom for your cat. It attaches to a window, creating a small, however, secure outdoor space. This type is perfect if you’re short on space and want something easy to install. Some models come as pre-made kits, while DIY options let you customize the size and materials.
Best for: Small apartments, renters, and cats that love watching the world go by.
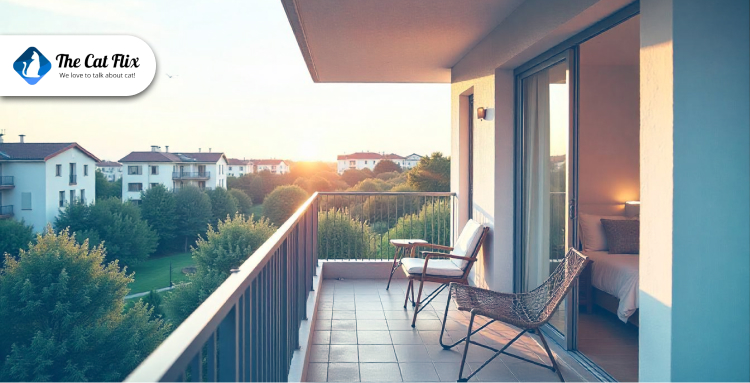
- Balcony Catios
If you have a balcony, you can transform it into a full-fledged cat paradise. A balcony catio is an enclosed space that keeps your cat safe while letting them enjoy the fresh air. You can go with a fully enclosed balcony using mesh or panels, or build a sectioned-off catio within the balcony itself. Either way, make sure it’s escape-proof—cats are expert climbers and squeezers.
Best for: Apartments with balconies and owners who want a larger space for their cat to explore.
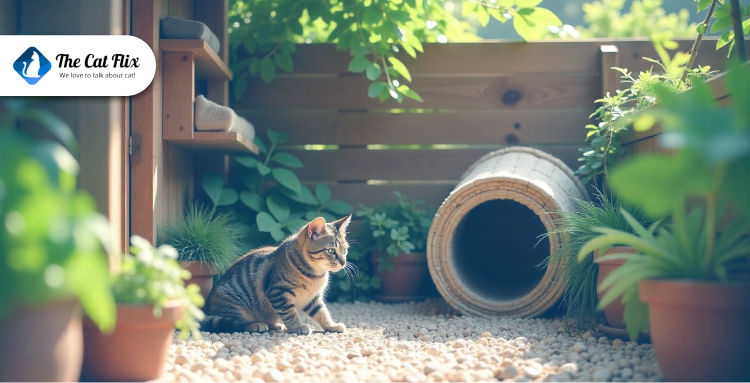
- Portable & Modular Catios
Need a flexible option? Portable and modular catios are lightweight, easy to set up, and don’t require permanent installation. They range from pop-up mesh tents to expandable tunnel systems that connect to a window or balcony door. These are great for renters or people who might move often.
Best for: Renters, people who move frequently, and those who want a temporary solution.
2) Checking Apartment Rules and Safety Regulations
Before you grab a hammer and start building your catio, let’s hit pause and talk about the important stuff: apartment rules and safety regs. Trust me, you don’t want to spend your weekend crafting the perfect cat paradise only to get a grumpy note from your landlord or a fine from the HOA.
Safety Concerns to Keep in Mind
Even if your landlord gives the green light, safety should be your top priority. Here’s what to consider:
- Fire Escape Access – If you’re thinking about using a fire escape for a catio, check local regulations first. In many cities, blocking a fire escape—even partially—is illegal. Always keep a clear path in case of emergencies.
- Weight Limits – Balconies and window frames have weight restrictions. A lightweight mesh enclosure is usually safe, however, a heavy wooden structure might be too much. If you’re unsure, check with your building management.
- Secure Mounting – Make sure your catio is stable and escape-proof. Use strong fasteners, secure mesh, and double-check all connections. If drilling isn’t allowed, opt for tension rods, brackets, or zip ties to keep things in place without damaging surfaces.
Best Practices to Stay Compliant and Avoid Fines
- Go Portable if Needed – If permanent modifications aren’t allowed, choose a freestanding or collapsible catio. These can be easily removed when needed.
- Use Non-Damaging Installation Methods – No-drill brackets, suction cups, and zip ties can secure your setup without breaking any rules.
- Keep It Neat – Some HOAs and landlords allow enclosures as long as they look tidy and don’t interfere with the building’s appearance. Stick to neutral colors and well-fitted designs.
3) Essential Materials and Tools

Now that you’ve nailed down your catio spot, let’s chat about what you’ll need to put it together. No fancy, overpriced gear here—just practical stuff and a handful of basic tools to get it done.
Frame Options
- Wood: Classic and reliable—cedar or pressure-treated pine are top picks. Easy to cut and screw together, a 2×2 frame costs about $20-$40 at a hardware store. Paint it to match your place, however, keep an eye on balcony weight limits since it’s heavier.
- PVC Pipes: Super light and wallet-friendly—$10-$15 builds a small frame. Snap it together with connectors (no saw needed), perfect for renters or portability. It’s not the toughest in high winds, though.
- Metal: Think aluminum or steel—tough and rust-proof. Pre-made kits with metal frames start around $50 and last ages. A bit pricier and trickier to cut, however, worth it for durability.
Covering Materials
- Wire Mesh: Galvanized or coated steel with half-inch gaps is the go-to—strong, safe, and airy. A 3×6-foot roll runs $15-$25. Snip it with wire cutters and staple it up.
- Plexiglass: Clear panels let your cat enjoy the view while blocking wind or rain. Expect $20-$40 per sheet. It’s heavy and cuts airflow, so pair it with mesh.
- UV-Resistant Fabric: Heavy-duty netting or shade cloth—light, flexible, and great against harsh sun. A 6×8-foot piece is $10-$20 on Amazon. Less sturdy, so layer it up in windy spots.
Flooring
- Grass Mats: Fake turf feels real and wipes clean—$15-$30 for a 3×3-foot piece. Cats dig it, however,add drainage or it’ll hold water.
- Outdoor Rugs: Cheap and comfy—think $10 for a small one. Pick weatherproof ones; indoor rugs turn moldy fast outside.
- Waterproof Panels: Vinyl tiles or composite decking ($20-$40 for a small area) laugh off rain and claws. Great for balconies, just a bit hefty to lug upstairs.
Additional Features
- Climbing Perches: Screw in wooden shelves ($5 each) or PVC ledges—cats crave height. Space them 12-18 inches apart for hopping.
- Bedding: Toss in a washable pet bed ($10-$20 on Amazon) or DIY a hammock with fabric and clips. Keeps them snug on cool nights.
- Toys: Hang a feather wand or ball track —keeps them entertained. Battery-powered laser toys are popping off this year.
- Shade: Clip on a tarp, bamboo screen, or UV fabric ($10-$25) for sun protection. Easy to adjust on top or one side.
More for your indoor cats: How to Keep Indoor Cats Entertained?
Tools You’ll Need
Round up a drill, screwdriver, staple gun, and wire cutters—most people have these, or borrow them. Add a tape measure and level to keep it straight. If you want to buy new, it can cost you about $50-$75 at a hardware store.
4) Step-by-Step Guide to Building a DIY Catio
Alright, it’s go time. You’ve got your materials, you’ve picked your spot—now let’s build that catio your cat’s been dreaming of.
#1. Planning and Measuring Your Space
Start by sizing up your spot. Grab a tape measure and jot down the width, height, and depth—whether it’s a window ledge or balcony corner. Sketch a quick plan on paper (nothing fancy, just a box with numbers). For a window catio, aim for at least 2×2 feet so your cat can turn around; balconies can go bigger, like 3×4 feet, if you’ve got room. Check your lease again—don’t block fire escapes or overload weight limits (50-100 pounds per square foot is standard). Mark where the frame will sit, and double-check it fits without hogging all your space. Five minutes here saves headaches later.
#2. Building the Frame: Secure, Stable, and Escape-Proof
Time to build the bones. If you’re using wood, cut 2x2s to match your sketch—use a handsaw or get it cut at the store. Screw them into a box shape with a drill, adding crossbars for stability if it’s bigger than 3 feet. PVC? Snip pipes with a hacksaw, snap them into connectors—done. Metal mesh frames? Assemble per the kit’s guide. Anchor it—clamp it to a window frame with brackets or tie it to balcony rails with heavy-duty zip ties (not the flimsy kind). Test it—shake it hard. If it wobbles, add more screws or ties. Cats are escape artists, so no loose joints allowed.
#3. Installing Mesh and Protective Barriers
Now, lock it down. Roll out your wire mesh or UV fabric—cut it to size with wire cutters or scissors, leaving an extra inch to overlap. Staple it to the frame every 4-6 inches (use a staple gun—$15 well spent) or secure it with zip ties for PVC. Pull it tight—no sagging, or your cat will paw a gap. For windows, add plexiglass on one side if you want a windshield—just screw it in, however, leave mesh elsewhere for air. Check gaps—half-inch max, or your cat’s out chasing squirrels. Step back and eyeball it; if it looks solid, you’re golden.
#4. Adding Enrichment Elements: Perches, Ramps, Hammocks, and Tunnels
Screw wooden perches ($5 each) into the frame—space them 12-18 inches apart so your cat can hop up. Ramps? Angle a scrap board between levels—nail it firm. For a hammock, clip a $10 pet one from Amazon to the frame, or DIY with fabric and carabiners. Tunnels? Grab a collapsible pet tunnel and zip-tie it inside—cats go nuts for them.
#5. Ensuring Weather Protection: Shade, Windbreaks, and Drainage Solutions
Keep it comfy year-round. For shade, drape UV fabric or a tarp over the top—clip it with binder clips so it’s adjustable. Windbreaks? Plexiglass or bamboo screens on one side block gusts. Drainage matters—tilt the frame slightly so rain runs off, or poke holes in grass mats if water pools. Balcony floors? Sweep water away with a cheap squeegee. Test it—hose it down. If your cat stays dry and cool, you’ve nailed it.
Check this out: 10 DIY Cat Furniture Ideas That Will Make Cat Happy & Home Stylish
5) Maintaining and Upgrading Your Catio
Nobody wants a dirty catio—least of all your cat. Keeping it fresh and odor-free is simple with a few good habits.
- Sweep and Wipe Down Weekly – Remove fur, dust, and dirt from floors, perches, and mesh. A handheld vacuum or damp cloth works well.
- Disinfect Monthly – Use pet-safe cleaners (like diluted vinegar or enzymatic sprays) to wipe down surfaces and prevent bacteria buildup.
- Litter and Waste Control – If you have a litter box inside the catio, scoop daily and deep-clean the box once a week to avoid bad smells.
- Check for Mold and Rust – If your catio is exposed to rain or humidity, inspect metal parts for rust and wooded areas for mold. Replace or treat problem spots early to prevent bigger issues.
Regular Safety Checks to Prevent Escapes and Damage
- Loose or Damaged Mesh – If your cat has been scratching or climbing, check for tears or weak spots in the wire mesh. Reinforce or replace as needed.
- Wobbly or Weak Joints – Over time, screws and zip ties can loosen. Tighten connections to keep the structure sturdy.
- Escape Risks – Cats are escape artists. Look for gaps, weak corners, or climbing hazards that might help them break out.
- Pest Control – Check for bugs, rodents, or bird droppings that could make the space unsanitary.
Enclosure
And there you have it—your cat’s got a sweet little outdoor spot, and you pulled it off, apartment-style. Building a catio doesn’t have to be a big, scary project—it’s all about keeping it simple, safe, and fun for your cat. You’ve got the know-how now: picking the right spot, throwing it together with stuff you can actually find, and keeping it solid through weather and wear. Your cat’s out there sniffing the breeze or napping in the sun, and you’re the hero who made it happen. Not too shabby, right?
Take a sec to enjoy it—snap a pic of your cat ruling their new kingdom. Then, share it with us. Drop a comment below—I’d love to see your setup and swap some ideas.